


The top of your vanity isn’t difficult to put together, but sealing the drain pipe and joining the pieces together needs a lot of physical effort.
Vanity tops are very heavy, so seek the assistance of a buddy if possible to help you place and move the countertop. Assemble the sink and connect the drainpipe with the plumber’s putty. Then, using silicone caulk, attach the pieces.
A skilled plumber can help you complete plumbing jobs quickly and securely if you are unsure about them. You may also want to look into purchasing a bathroom vanity set, which includes a vanity and matching mirrors, lights, and faucets.
Table of content:
Step 1: Disconnect and turn off the water supply
Step 2: turn off the water supply to the sink
Step 3: remove the vanity top
Step 4: remove the vanity base
Step 5: Prepare the wall for the new vanity
Step 6: prepare the back of the vanity
Step 7: place the vanity in its proper location and level it
Step 8: put the vanity base in place
Step 9: Connect the drain, faucet, and sink
Step 10: install the cheap bathroom vanities top
Step 11: Connect the plumbing
Step 12: test it
Step 13: Install the hardware and doors
Step 1: Disconnect and turn off the water supply:
Use the shutoff valves beneath the sink to turn off the water supply. Disconnect the water supply tubes with an adjustable wrench, keeping a pail nearby to capture surplus water.
Step 2: Turn off the water supply to the sink:
To detach the p-trap (the u-shaped component of the drainpipe) from the sink’s vertical drainpipe, loosen it with pliers and capture any excess water in a pail.
Step 3: Remove the vanity top:
Using a utility knife, cut the caulk along with the backsplash. If the vanity top is also linked to the base, remove it using a drill and chisel. The top of the vanity should then be carefully removed.
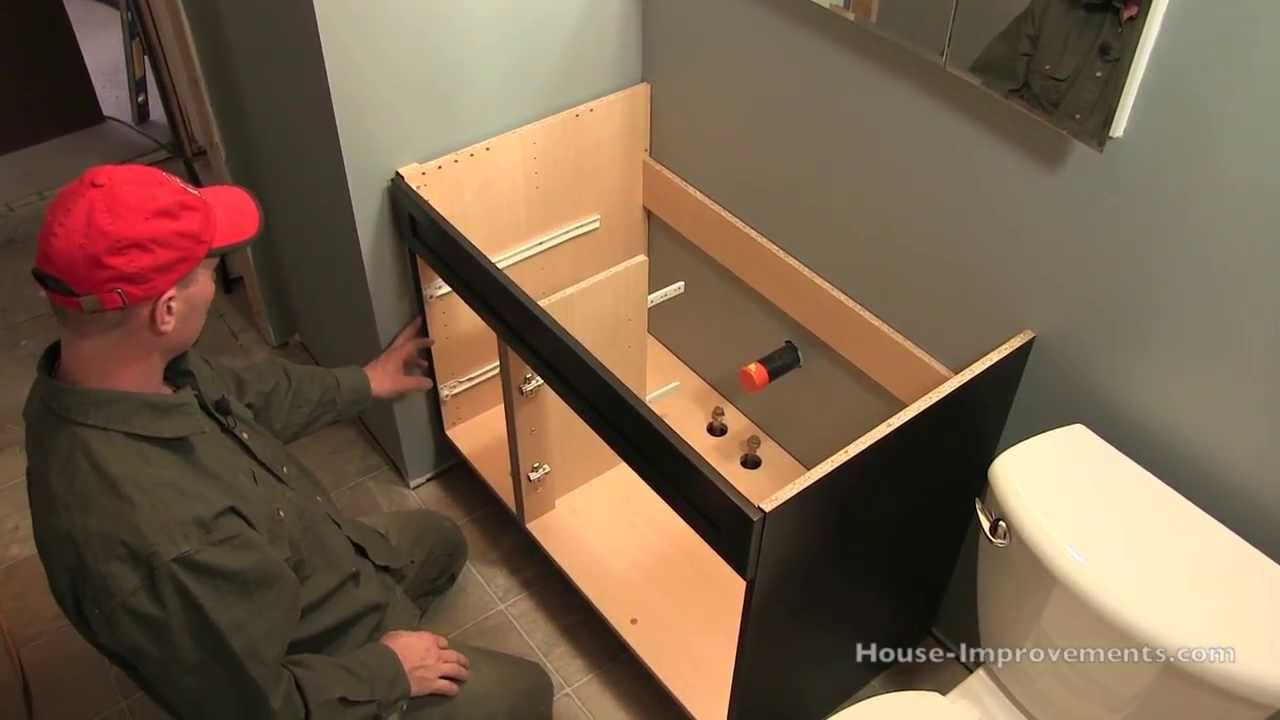
Step 4: Remove the vanity base:
To remove the vanity base, use your drill to remove any screws from the back of the ground and then lift the vanity out. Make any necessary repairs to the walls.
Step 5: Prepare the wall for the new vanity:
Follow the manufacturer’s directions for specific tasks, then begin by outlining your new vanity on the wall, considering its height, width, and placement. There are usually 16″–24″ spaces between studs.
Step 6: Prepare the back of the vanity:
Many vanities have plumbing ports in the back. If yours doesn’t, you’ll have to make your holes. Make a note of these measurements on the back of your vanity.
Step 7: Place the vanity in its proper location and level it:
Set the vanity in place by tracing your outline on the wall. Check sure the top of the base sits equally at all four corners with a level.
Step 8: Put the vanity base in place:
Screw the rear of the vanity into the studs with a drill. Anchor holes that don’t line up with studs with anchors that match the type of wall.
Step 9: Connect the drain, faucet, and sink:
First, connect the faucet and drain, then install the plastic gasket beneath the spout and handles. The faucet and handles should be used to fill the holes. To keep the washers and nuts in place, place them beneath the sink. Push a bead of plumber’s putty into the drain’s lip. Tighten the mounting bracket beneath the sink.
Remove any extra putty with a damp cloth. Install your sink if it isn’t already attached to the countertop. Because each sink type has a distinct installation method, we recommend following the manufacturer’s instructions.
Step 10: install the bathroom vanities top:
Apply a tiny layer of adhesive to the vanity base’s top. Then gently install the vanity top in position, making sure the plumbing is aligned. Also, if the vanity top has a tiny overhang at the bottom, make sure it is even on both sides.
Step 11: connect the plumbing:
Wrap plumber’s tape around the threaded sections of the drain and water supply lines to create a watertight seal.
Step 12: test it:
Let the water flow by turning on the faucet. Check for any evidence of leaks and make any necessary adjustments.
Step 13: Install the hardware and doors:
• clean and dry surfaces free of oil, filth, and grease with turps before applying methylated spirits.
• allowing wiggle room by using silicone to secure the bathroom vanities top to the cabinet.
It won’t move once it’s entirely dried.
• when applying the silicone sealant for the first time, extrude a tiny amount onto a scrap piece of material to guarantee a smooth, continuous flow.
Complete the look:
You might want to explore some further changes after installing new bathroom vanity and sink. This is an excellent time to replace your vanity lighting and mirror. With bathroom trends to follow now, you can learn how to keep on top of the latest bathroom décor trends, whether you want a traditional or modern bathroom.
Conclusion:
Your vanity is likely to be the significant point of your bathroom, regardless of its size or style. It’s a stylish, practical accessory that you use daily. As a result, replacing an old bathroom vanity with a new one or giving your space a more modern style is an excellent decision for any home. To be sure, more and more homes are opting for DIY vanity installation to save money, and you can do it as well. Here, the above mentioned, how to install your favourite type of bathroom vanity in a simple step-by-step method.


